In qualitative research, the process of coding refers to the systematic labeling of data in order to identify and classify patterns, themes, and concepts. Within Error Analyzer, this process is operationalized through two interconnected elements: tags and annotations.
- A tag represents a category in your analytical framework. It is a conceptual label, such as Subject–Verb Agreement Error or Figurative Language. Together, your tags constitute the project’s codebook.
- An annotation is the application of a tag to a specific segment of text. By linking your conceptual label to actual linguistic evidence, you transform abstract categories into structured data.
This section describes how to build your codebook, apply it to your texts, and manage your annotations systematically.
Part 1: Building the Codebook #
Before analysis can begin, you must establish the set of codes that will guide your work. This is done through the Tag Library, located in the Noteboard panel on the right-hand side of the workspace.
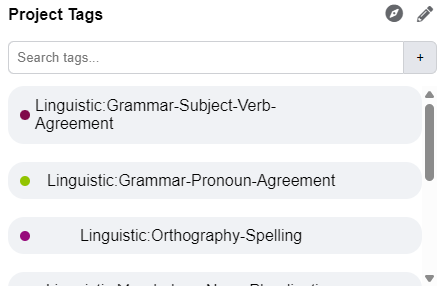
- Creating Tags: Enter a descriptive name for your code (for example, Subject–Verb Agreement Error) and confirm it with the add button.
- Defining Tags: Each new tag requires a description. This definition should be precise and operational. For instance: Use for errors where the grammatical number of the subject does not match the form of the verb. Writing clear definitions ensures consistency and methodological transparency.
- Organizing Tags: Tags may be organized hierarchically by assigning parent tags (for example, a broad category Grammar that contains subcategories such as Verb Errors or Noun Errors). This hierarchy allows for both detailed and aggregate analysis.
- Color-Coding: Each tag is assigned a unique color, which will later mark annotated segments in the text, providing immediate visual feedback during analysis.
By repeating this process, you build a comprehensive codebook tailored to your research objectives.
Part 2: Annotating the Text #
With your codebook in place, you can begin applying it to the data. Annotation takes place within the Sources panel.
Highlight the relevant segment of text in either the original or corrected version.
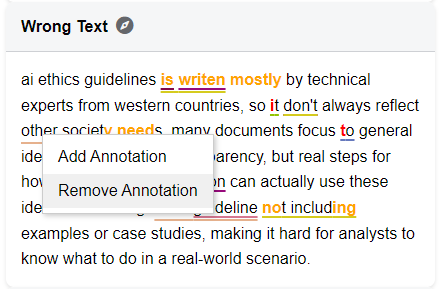
Right-click on the highlighted text to open the context menu, then select Add Annotation.
Choose the appropriate tag from your library and save it.
The chosen text segment will now display a colored underline corresponding to the tag. Hovering over it reveals the tag’s name and definition, reinforcing both accuracy and transparency.
Part 3: Interpreting the Results #
Each annotation becomes part of a structured dataset that links conceptual categories to empirical evidence.
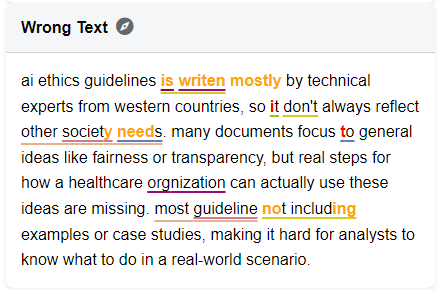
- Visual Feedback: Colored underlines in the text indicate coded segments, making it easy to trace patterns during close reading.
- Dataset Construction: As annotations accumulate, they feed directly into the Tag Report, where frequencies, distributions, and trends can be examined across the entire corpus. This integration turns individual coding decisions into aggregated data suitable for quantitative and mixed-methods analysis.
Part 4: Managing Tags and Annotations #
Error Analyzer provides tools to ensure that your coding framework remains consistent and adaptable.
- Removing Annotations: If a tag has been applied incorrectly, right-click the annotated segment and select Remove Annotation. You can then choose which tag to detach.
- Deleting Tags: To remove a single tag, hover over it in the Noteboard and click the trash can icon that appears. For bulk deletion (more than two tags at once), click the pencil icon to enable edit mode, then select the tags you want to delete. Be cautious: deleting a tag permanently erases all annotations associated with it throughout the project.
This dual capacity—flexibility in refining your framework and permanence in its application—ensures that your codebook evolves with your research while preserving methodological rigor.
Using the Auto-Tag Tool: Your AI-Powered Annotation Assistant #
The Auto-Tag Tool is an advanced feature of the AI Workspace chat that automates one of the most labor-intensive aspects of qualitative analysis: applying tags to text. Rather than limiting the AI to answering questions, this tool allows you to issue direct commands, instructing the system to annotate data on your behalf.
The design philosophy behind Auto-Tagging emphasizes three principles: precision, control, and efficiency. The tool operates only on the text pair currently visible on your screen. By restricting its scope to a single Error/Corrected pair, the system ensures that each automated action is small, transparent, and subject to immediate human review. This preserves your control over the analytical process while accelerating repetitive coding tasks.
The Auto-Tagging Workflow #
Step 1: Activating the Tool
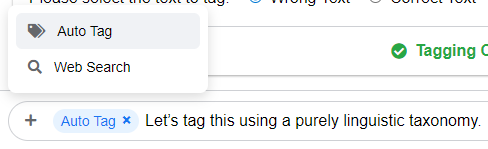
In the AI Workspace, open the Chat Interface at the bottom of the panel. Clicking the “+” button next to the input field opens the Chat Tools menu, where you select Auto Tag. A small label appears beside the chat box confirming that Auto-Tag mode is active.
Step 2: Writing a Clear Instruction
The quality of the output depends on the clarity of your command. Effective instructions typically specify three things:
- What to find: The linguistic feature or error type (e.g., “all missing articles,” “incorrect subject–verb agreement”).
- Where to look: Whether the system should analyze the Error Text, the Corrected Text, or Both.
- Which tag to use: The exact label from your Tag Library (e.g., Capitalization Error).
Example of a precise command:
Find every word with incorrect capitalization in the Error Text and apply the “Capitalization Error” tag.
Example of a vague command:
Tag the mistakes.
The latter is too ambiguous for the AI to interpret reliably.
Step 3: Reviewing the Plan
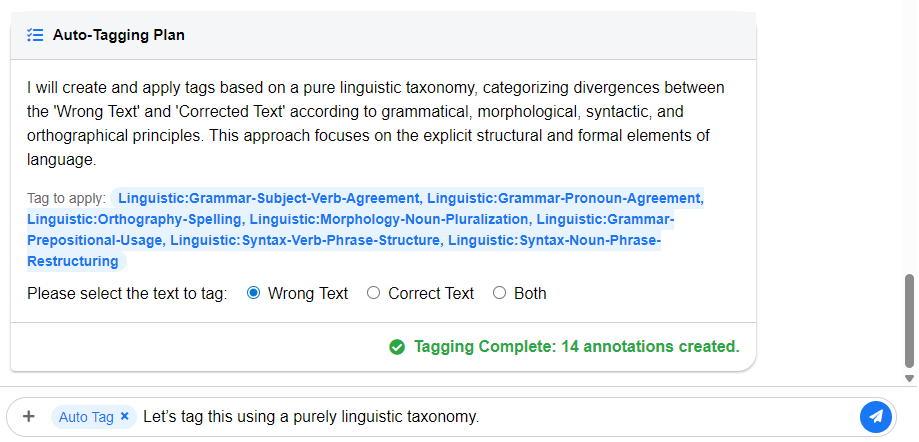
Once you send an instruction, the AI does not immediately act. Instead, it generates an Auto-Tagging Plan, outlining how it intends to interpret your command. For example:
Plan: I will search the Error Text for instances of incorrect capitalization and apply the tag: Capitalization Error.
Only when you explicitly approve this plan (by clicking Start Tagging or Execute) does the system proceed. This step functions as a methodological safeguard, ensuring that the AI’s interpretation aligns with your intent.
Step 4: Verifying the Results
After approval, annotations are applied almost instantly. The newly tagged segments appear with colored underlines, corresponding to the tags in your library. The chat displays a confirmation message, for example:
Tagging Complete: 2 annotations created.
You can hover over the underlined text to check the tag details or right-click to remove or adjust any annotation.
The Role of Auto-Tagging in Research #
The Auto-Tag Tool does not replace human judgment. Instead, it accelerates repetitive tasks while leaving interpretive responsibility firmly in your hands. Each automated annotation is open to inspection and correction, maintaining transparency and accountability in the coding process.
By combining computational speed with human oversight, Auto-Tagging allows you to focus your attention on higher-order analysis and interpretation, while ensuring that the mechanical aspects of annotation remain systematic, consistent, and efficient.
⚠️ Important for researchers: Automated tagging should always be treated as provisional. The AI may misinterpret subtle cases, overlook context, or apply tags too broadly. Use Auto-Tagging to save time, but always review the results critically before drawing conclusions.